
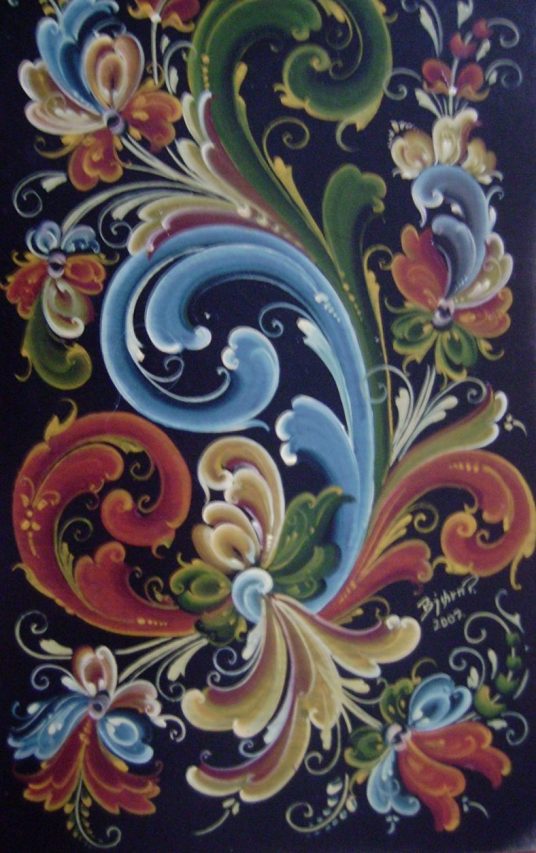
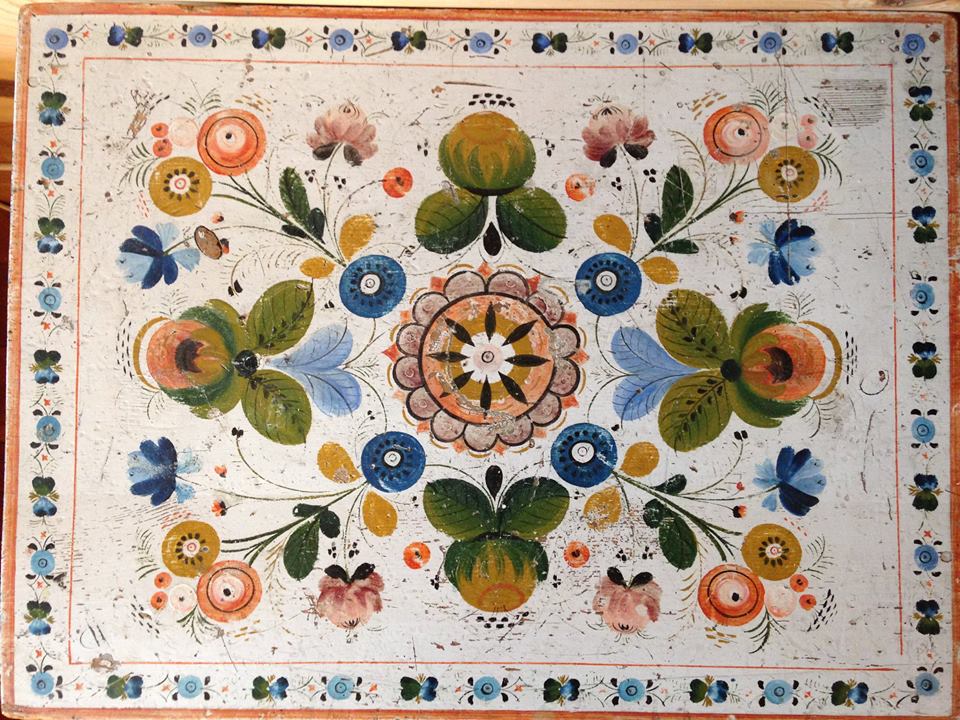
Rosemaling is the traditional painting of Norway. Originating in the mid eighteenth century, Rosemaling reached its zenith in the early 20th Century. Renewed interest in everything considered traditionally ‘Norwegian’, popularized the art form, and created renewed interest, without which, it may have been relegated to history.

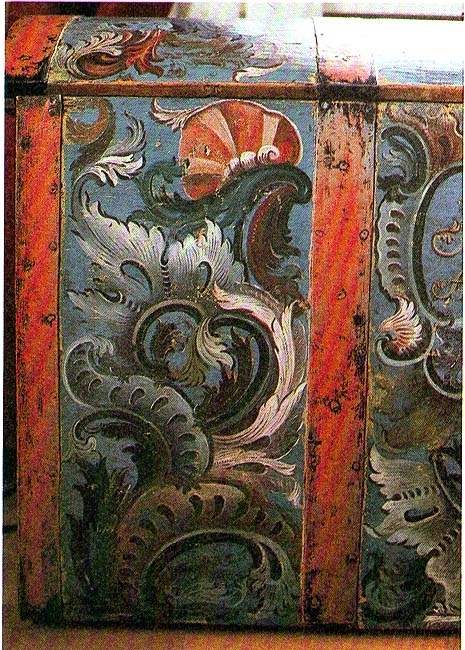
What first began as a form of peasant painting, developed into a highly stylized and exquisite form of religious art, based on the acanthus leaf motif, rose and tulip forms. Itinerant artists travelled the countryside painting the not only the walls of the local Stave churches but also the living areas of farmers, who enjoyed the decoration on their walls and everyday objects.

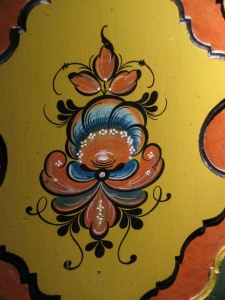
In the isolation of the Norwegian countryside, this new art form continued to develop further, resulting in a variety of individual styles that differed according to the valley or regions, from whence they came. Examples include: Telemark, Rogaland, Hallingdal and Os (from Bergen area).

To find out more about Hallingdal Rosemaling, try out a free design for yourself, go to the free Hallingdal project design found here.
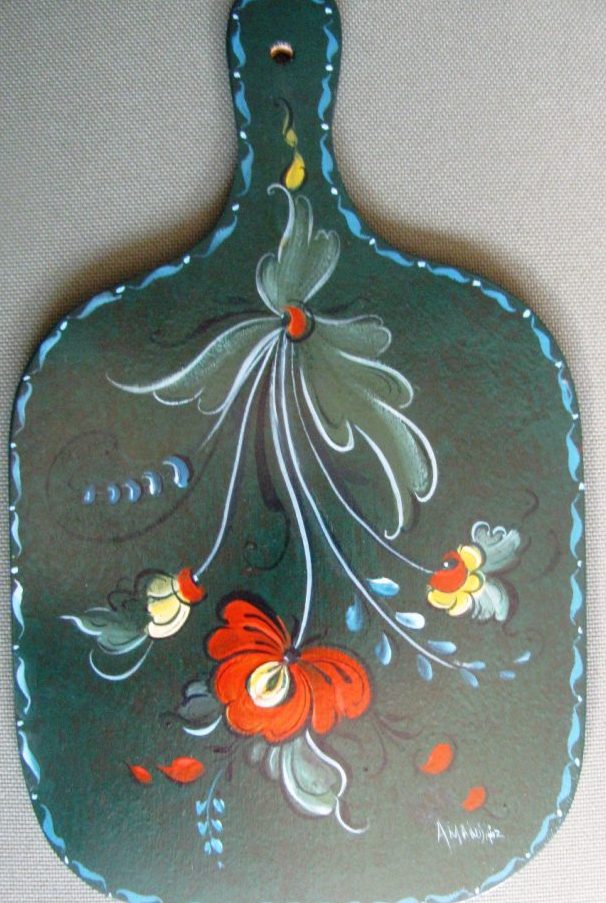
Telemark style appeared in the Telemark Valley, is characterized by free flowing, dynamic scroll work, and asymmetrical designs. It is this style this tutorial will focus on here. Some knowledge of folk art comma strokes is necessary to paint this. If you are not familiar with basic stroke technique – there is a video on this post.

Telemark Rosemaling Tutorial
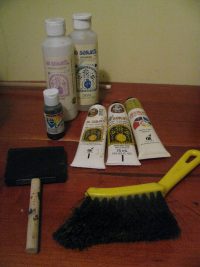
Supplies
Acrylic paint in the following colours – (choose a good quality gouache, not transparent student quality paint, as this will help you with this technique)
Prussian Blue or the main colour
Smoked Pearl
Warm White
Filbert or flat brush, about 1/4- 1/2″
Liner brush, – not too long, a size 1 or a Quill liner
Sandpaper #400 – #600
A wooden piece, canvas or object to paint
Base paint – flat, matte or low sheen paint. Stay away from glossy finishes for base paint, otherwise your paint may not lock, or key, to the base colour.
Palette:
I make a disposable palette for acrylics, by wetting some ordinary kitchen paper towel and squeezing it so it is just damp, and not wringing wet, and then wrap this in grease proof paper as one would a sandwich.

Step 1.
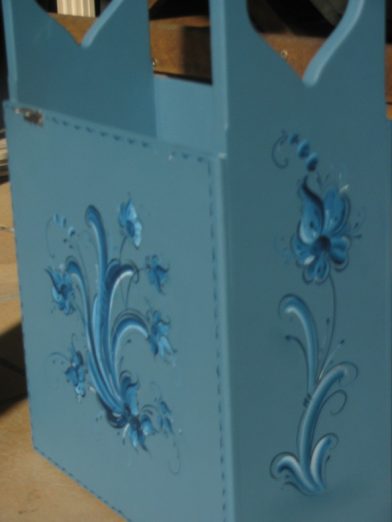
Base paint your piece or prep your canvas, in a chosen colour scheme. It is more economical to purchase a larger pot of base paint, but you can use tube gouache fro this purpose as well if you water it down a little. I picked Jo Sonja’s Prussian blue and lightened it down with a creamy colour (Jo Sonja acrylics Smoked Pearl) Two coats. Allow this to completely dry.
Step 2.
With non- powdery chalk or chalk pencil, chalk in some guiding points, like the root of the Telemark design and outside border. If you don’t want to paint freehand, you could chalk or mark in the main scroll lines, with transfer paper, and use a outline for the flowers. Later, when you get the hang of the shape of the flowers, and what your brush can do, then you can simply mark an x for where the flower will go and its orientation.
Tip:
To make your own transfer paper using chalk:
Draw up your design on tracing or grease proof paper, using a lead pencil. Rub a stick of chalk, (held parallel to the paper), over the BACK side of the penciled design. Carefully lay the tracing down on the wooden piece and secure with tape. Now just trace over your design again, and you will have a chalk tracing imprint on your piece. Voila. Easily removable once your painting is finished and dry.
Design
When designing, keep in mind balance of shape, size and element.If you divide the design in quarters, it will appear balanced if there is a major element, or part thereof, positioned, in each quarter. Each quarter should also have an equal measure of positive and negative space.
Tip: Look at the design upside down to distract your left brain from interpreting as you normally would, giving you a fresh eyes to see any design faults.
Painting Technique
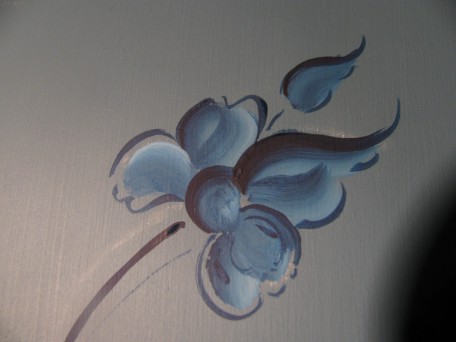
Step 1. Load a filbert ( flat with rounded tip) or flat brush in size appropriate to the width you want the scroll to be in darkest value, on ONE EDGE ONLY. In this case: Prussian blue. On the opposite edge, load Warm white or your lightest value. Flatten the brush on the palette so that the colours mix. Repeat this on your palette a number of times so that the colours gradually blend across the bristles.
Step 2. Begin painting the scroll from the top down, applying pressure as you go, so the brush widens, and releasing pressure as you near the end of the scroll, as this will narrow the stroke at the design root.
Step 3. Repeat the stroke if needed for coverage then add more of the darkest value on the outside of the scroll, to enhance the contrast. Be careful: Acrylics dry quickly and you may need to use a retarder medium to slow the drying time, giving you more time to play with the design. Retarder can be added to your brush or brushed on to your piece. This gives you good practice at stroke-making prior to laying down the paint.

Step 4. Paint remaining scrolls in the same manner. Try to have them all merging towards the one root point. This is a very important part of making Rosemaling eye catching. Vary the length of the each scroll to add interest.
Step 5.

Begin to block in the flowers using shape following strokes, comma, or leaf shape (S and C strokes) as appropriate. These can be quite casual and double load your brush again with light value on one side and dark value on the other to give your project a natural blended look. Don’t worry too much about shaggy edges here, as the liner work will tidy that up.
This is also a free style of painting, it is not Fine Art, and the peasants that originally painted these pieces had little or no training in artistic techniques. So don’t stress trying to make it perfect when it is not meant to be so.
Try to achieve a balance of colour as you go. If the brush has blended really well and the light value is lost, add some extra warm white to your dirty brush (ie. don’t rinse it clean in water, just wipe on paper towel to remove excess colour.)

Once you have blocked in the flowers, and are happy with the distribution of colour, you can begin the liner work.
Warning: Liner work is very addictive, and it is easy to get carried away with the embellishments and make the design too busy. Beware! You can always add an extra stroke, later, but rubbing out can ruin a design.
You may also like to try adding something like flow medium to your paint to do some liner work. This will help a beginner. Practice a little on scraps of wood or paper first to get the hang of the brush to save wiping out mistakes.
Step 6. Scroll Details
Begin by adding enough water to your paint puddle to ensure an inky consistency. Load the brush in the paint and pull it through twisting it gently a little before you lift it from your palette. Place tip on project and gradually increase the pressure allowing the brush to widen the stroke, then release the pressure as you direct the brush tip towards you.
N.B. For best results, liner work should vary in thickness. The last thing you want is for all the outlines to be the same thickness. Variation creates interest in the design.
Outline all the scrolls in a casual manner. Try to move your arm as opposed to just your hand. This helps to create a sense of movement. Be confident. You can clean up any errors, carefully with a cotton bud or Q-tip.

Step 7. Flower details
Outline flowers in same technique with your liner brush.
Be individual and don’t follow the same outline each time.
Step 8. Embellishments
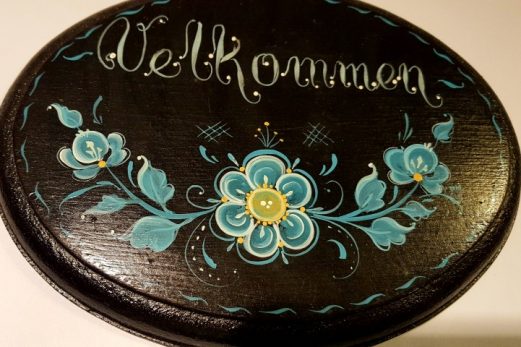
Add some small detail strokes with a quill or liner brush. They are completed similar to a reverse comma. Starting off with very light pressure and pressing fully down on the completion of the stroke. I double loaded this brush in the picture here, first loading in blue and then dipping the tip of the brush in white. This gives a white stroke with a blue tip. This stroke is very typical of what you see in traditional Rosemaling works.
But…. Know when to stop. Overdoing it can make a design look too busy!! I am guilty of this often when I get lost in my liner work and don’t stop to look at the whole piece.

Step 9. Borders
Now you have it! Almost all Rosemaling works have a border design, which can be as individual as you like. I used ‘S’ strokes around the edges of my box.
Step 10. Finishing
All you need to do is allow time for the paint to dry – which can be anything from 2 days to a week depending on weather conditions, oils can take up to 6 weeks to fully dry.
Rub off any guidelines and 2 coats of water based varnish will seal the deal! If you are wondering what type of varnish to use, that is a difficult question to answer. Experiment with a few brands and types to see what works. I like to use a matte or a gloss spray varnish for speed. But equally good are the brush on or wipe on varieties. Oil based paints require oil based (non yellowing) varnishes.
If you have any questions, I am happy to guide you. You can find some of my Rosemaling designs printed on fabric at my online Spoonflower shop here.
Further instruction in painting Telemark Rosemaling using Oils paints visit this post.

Beautiful art.
BE ENCOURAGED! BE BLESSED!
LikeLiked by 1 person
BEAUTIFUL ART!
BE ENCOURAGED! BE BLESSED!
LikeLike
Great article! I remember my sister taking rose painting lessons and I was always envious that she learned how to do it… We have several chests and bowls at home with the rosemaling pattern, nothing looks more Norwegian!
LikeLiked by 1 person
It is never too late to start learning Sunny. Yes, very Norwegian. It is one of those techniques that is dying out, so it is important that a few of us keep the old techniques going.
LikeLiked by 1 person
Reblogged this on Something to Ponder About and commented:
This was my second top post for the year. The top post was a photography theme I posted just the other day so I thought it better to re-post No.#2. There are a few people out there wanting to learn these old traditional painting methods, or so it seems. Was my tutorial helpful?
Something to ponder about.
LikeLiked by 1 person
That is so beautiful. I’d never try it, though, because mine would end up posted as a “what not to do”! LOL
LikeLike
A lot of it comes down to a heavy dose of practice to start with. Once your hand and eye have learned what to do, it comes easier. But it is a learned technique
LikeLiked by 1 person
Beautiful!
LikeLike
Thank you so much! I appreciate your visit.
LikeLiked by 1 person
I learnt something new, thank you. (Not every day does one, right?)
Hadn’t heard of rosemaling. Now, it made me think of some other motives I’ve sen before. Russian maybe? Are you familiar with those? It would mean some sort of cross cultural influence. (Which always fascinates me)
Be good.
Brian
LikeLiked by 1 person
Yes, Brian – I am familiar with Russian folk art and their various techniques. Zhostovo and a technique of painting gold on black to name two techniques. Not many know of Rosemaling here though, unless they have some connection to the Scandinavian communities. So I am unsure that you could call it cross cultural influence. If it is, it would have to be a conscious one! Many of the European folk arts – Bauernmalerei from Germany and Alpbachtal from Austria as well as Russian and Scandinavian have their roots in Renaissance artforms. The stylized tulip motif represents the Holy Trinity and you will see acanthus vines in modern art forms. One you see it, you can’t unsee it!
LikeLiked by 1 person
I was thinking over there in Europe. There was much more communication than what we can think now. And exchange.
I didn’t know the tulip motif was a representation of the Trinity. I will look it up next time I’m in France. (Hopefully this summer if international flights are not all canceled…)
LikeLike
My grandma was a painter and one of her parents was norwegian, although I’m not sure which. She did rosemaling in this style, and I’m trying to learn more about it now that she’s passed. She painted cutting boards, stools, tiles, all kinds of objects in this traditional style.
LikeLike
It is wonderful that your Grandma was a painter, Sandra and possibly her father as the painting was frequently done by male painters in days gone by. Her work will be a great inspiration to you. If you are based in America, there are many teachers available to you, in addition to online classes at Vesterheim Museum. I am also going to begin a tutorial subscription for beginner’s designs on the Patreon platform. For more ideas or questions, there is a Facebook Rosemaling group of which I am an administrator. Good luck and I would love to see your work if you showcase it on a blog.
LikeLike
Your art is beautiful. Thank you for visiting my Art site as well. I am a new artist in training. I never really knew I could do this, but I am trying at this point in my life. But I so enjoy learning. And its fun, and to me, thats what it is all about. I am going to subscribe, to you. Thank you. Have a blessed day.
LikeLike
Thank you for following StpA. Welcome! What sort of art genre do you prefer?
LikeLike
I am so new, I don’t know, but my son categorized me as just being a Mixed Media Artist. Thank you, I look forward to your posts.
LikeLiked by 1 person
Excellent. There is a lot of interest in mixed media in the art communities at the moment. I hope you enjoy it!
LikeLiked by 1 person