has another DIY Tutorial on learning to use, what I think, is the highly complex DSLR cameras, in my case the Nikon D3100. and I need lots of help. In the link above, Shutter speed is discussed as an element in the ‘triangle’ of learning correct exposure.
It’s Overflowing explains:
Shutter Speed controls the amount of time that the shutter is open when you’re taking a picture. So the first thing that Shutter Speed controls is the amount of light let in! The higher you set your shutter speed number the quicker your shutter will open and close again, this, of course doesn’t allow tons of light to come into your camera. The lower you set your shutter speed number the slower your shutter will open and close again, this of course allows for tons more light to come into your camera.
Each number stands for the amount of time you’ve chosen to leave your shutter open. For example, 500 would mean you want your shutter to stay open 1/500 of a second {totally open for a short time, right!} The same applies to the other shutter speed settings. The number is the amount of time the shutter is open per a second. Some examples of shutter speeds are: 1/500, 1/400, 1/320, 1/250, 1/200, 1/160, 1/125, 1/100, 1/80, 1/60, and so on.
So we have to be careful the shutter speed is not too low, or else we get motion, or otherwise, blur. Sometimes, this is a desired effect, other times it can ruin the camera.
Night time effects like sparklers, or flashlght or headlight patterns would require a slow shutter speed to capture the movement of the light. However, you would probably need a remote or everything in the image will be moving and blurry.
It’s Overflowing explains again:
- If you are taking a picture of your child dancing, jumping or playing sports, you will want to use a faster shutter speed, such as 1/250, 1/500, 1/1000.
- If you are taking pictures of your child holding up the number of fingers that represent their age or a frozen still smile picture, or taking a family portrait, you will want to set your shutter speed to 1/60, 1/80, 1/100.
- If you are taking a picture of a craft or food, you will be best setting your camera’s shutter speed low…sometimes as low as 1/30. However, anything under 1/60 will be prone to have a little blur, unless you have an INCREDIBLY steady hand or are using a tripod.
- If you are taking a picture and want to include a little motion in your picture, such as taking a picture of a spinning ride at the fair or a waterfall, you will want a super slow shutter speed, such as 1/4, 1/2, 1, 2, 4, 8. {When you get down that low the shutter is staying open for full second counts}. You would DEFINITELY need a tripod and remote for these settings.
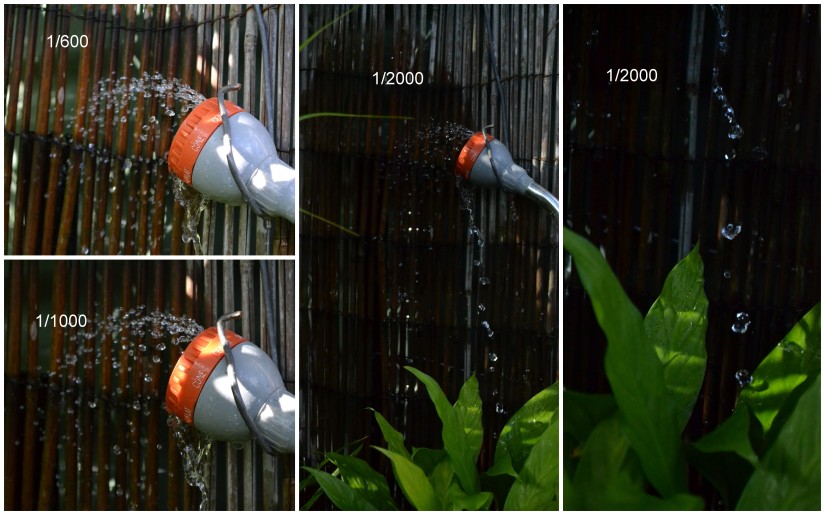
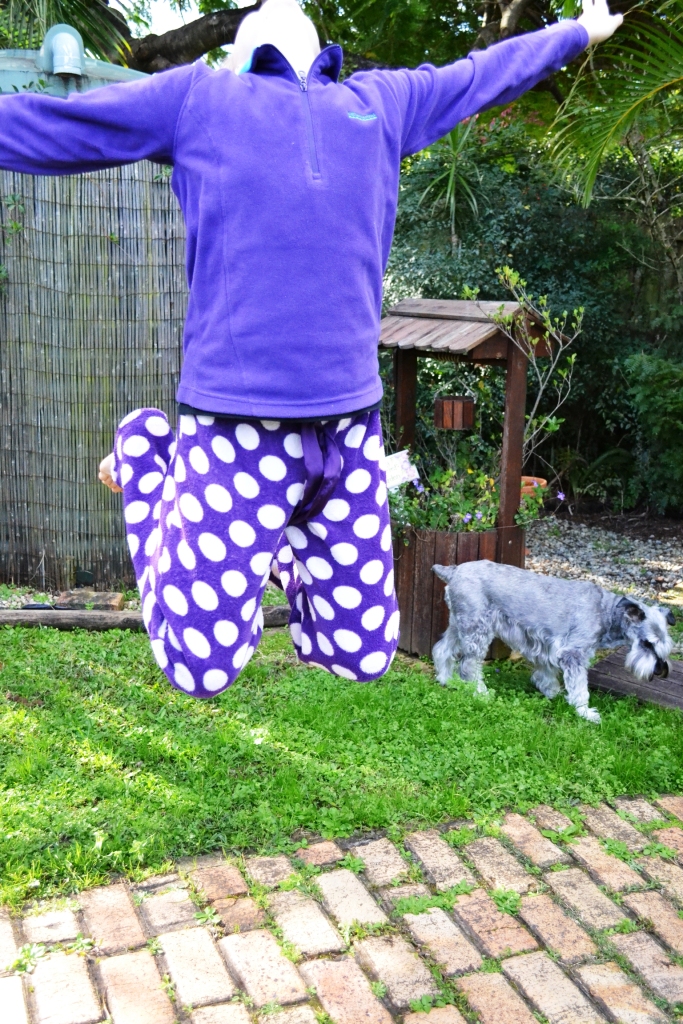
A stream of water is a good way to freeze high motion pics and see the effects of changing the shutter speed. I also got the dog to jump down from the couch ( its second home) and my daughter jumping into the air, to see if that resulted in any blur. I wanted to try blowing some glitter against a black backdrop but alas, was out of glitter! So here are some results:
I love the way you can freeze the action of water droplets falling with this feature….. they almost look like glass beads!
Almost no blur! The photo of the dog was taken at 1/500 f- 3.5, and to go higher meant the photo got quite a bit darker. Anyway, I was sure that if I had taken the same photo with my Canon Powershot, it would have been blurred. Still have to figure out how to adjust for the diminished level of light in the higher shutter speeds, when you are not in the brightest of light situations. And try a deliberate motion blur at nighttime, but I will ponder this, for now… Shutter speed tutorial from It’s Overflowing: nailed!


1. Too much light ruins the shot not the camera.
2. F stop sometimes controls blur more than speed since it controls depth of field
LikeLike
Thanks for that comment, and I do understand about the f stop, as that was my last post about It’s Overflowing tutorial, however, I was also referring to intentional blur, when you do want that feeling of motion. ( night time shots with light trails etc.)
LikeLike
Interesting! Good on you for the practice! 🙂
LikeLike
Thank you!
LikeLike