


Despite the intense heat of the last few days, I did manage to produce a small item of decorative art. An old metal jug/watering can needed a facelift. A simple daisy flower painted with a technique of using progressively lighter overlaying shades of acrylic gouache, some blended dry brushed leaves and some flyspecking with a toothbrush and diluted warm white paint and voila…. it has a new functional life with a new look! This is a simple way to decorate items around the home.
For best results, it is best to lay down a base coat of good acrylic low sheen paint first, so that your decorative paint will ‘key’ adhere successfully.
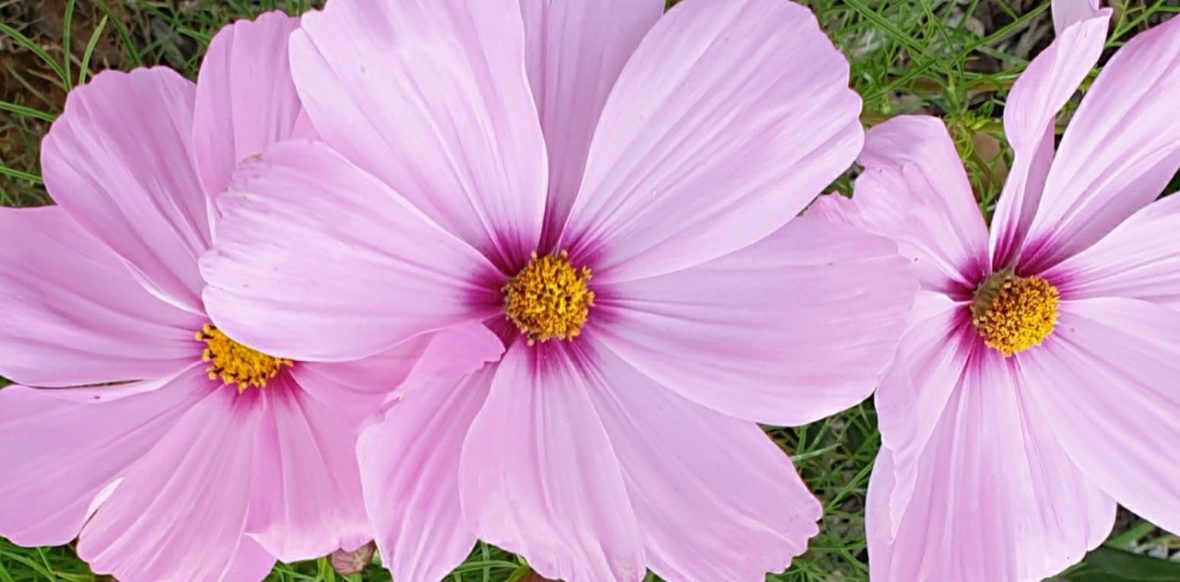
If you aren’t familiar with a dry brush technique, it is as it says: using a dry brush that is loaded with acrylic paint ( no water ) and skimmed over a darker surface to create highlights that enhance a dimensional appearance. The leaves are painted in this manner with a dark green base and then warm white is added to the green colour to create progressively lighter tones on the parts of the leaf where the light source would hit. This creates a curved effect. A darker shade on the opposite side of the vein defines the shadowed area.
The overlay technique is outlined below in a previous post which I have reproduced below:
(slightly different flower but the technique is the same)
Daisies are based in grey and then warm white is progressively added to the grey, then a final layer of warm white to highlight the petal.
A shadow is created by shading with a washy blue-black colour near the centre.
Stipple the centres with a round hog’s hair or stiff deerfoot brush, with yellow oxide and burnt sienna. Detail dots are in these colours plus warm white.
Simple but effective pot for the top of the fire place, or a small watering can for my indoor plants.
Something decorative to ponder about.
Overlay Technique
A quick but effective way to decorate a small object is by painting a simple garland of hand-painted flowers. “Oh! But I am not a painter I hear you say!!” Well, that’s ok, because you don’t need any specific skills for this technique. It is VERY forgiving! And it does not have to be perfect.
1. Prep Base with colour of choice
2. Trace outline or guidelines

3. Using your chosen dark colour, (in the example: Paynes Grey/Dark Blue) stroke in the petals with shape-following/comma strokes, beginning at the outside of the flower and pulling the strokes towards the centre, using a synthetic/sable round brush in size 3 or 4, depending on how big you want the petals.
*If you know how to do ‘comma’ strokes, use them, but a fine tapered tip near the centre of the petal is not necessary. So don’t stress. If you need more help in forming the strokes: see linked articles below.

4. Load a round or filbert synthetic brush (hogs hair or sable brushes don’t work so well here), with Warm White, or a light contrasting colour.
NB: In this technique, you do not wet the brush, or if you do dip it in the water jar, squeeze out most of the moisture, on some kitchen paper towel.
5. Begin to gently stroke in some colour, on top of the already existing blue colour, pulling just the top half of the brush over each petal, starting at the outer edge. Lift off completely before reaching the end of the petal, so that the darker blue colour will still show towards the centre. The dark colour then acts as your shadowed area, and the white is the highlighted area of the petal. This gives your flower more of a three-dimensional look.
6. Continue adding layers of warm white in this dry brush technique until you are happy with the effect.
Caution: It is always easy to dry brush additional highlight into the petals, if there is not enough, however, removing it if you have put on too much to begin with is extremely difficult and messy. **** If this happens, just re-do your basecoat of dark blue again, and start from #4.
7. If need be, use a brighter white, in an even smaller area near the very edge of the petal, to create ever more of a highlight. Watch the leaf that has the turn-back, as this leaf will be in more shadow than the others, and as such, still retains most of the blue shade. 
8. Paint the centre with a ‘stipple’ effect, in a c shape, leaving the centre in the dark blue colour. The highlight colours I used include: gold oxide, yellow and white on the very highest edge. The ‘stipple’ effect is sort of like dot, dot dotting, the colour in just with the very tip of the brush. You can use an older brush for this, or a round hogs hair brush, as it is not so imperative to have a fine point.
In this example, I also used the same dry brush technique for painting the leaves: Using a pine green colour for the base, and adding progressively more yellow to the green to get a lighter colour, using this as my dry brushed highlight.

Related Articles:
how-to-paint-comma-strokes-beginner-folk-art-painting-tutorial/

This is lovely. I would love to do painting like this.
LikeLike
It is not so hard Ineke, once you master the basic comma strokes. There are lots of tutorials these days on the net. You just need the correct brushes, as the ordinary brushes you find in newsagents won’t give you good results at all. Have you heard of Hindeloopen art? Originated from a province in the north of the Netherlands. It is a simple but elegant traditional art form that I really like. I started out doing that style
LikeLike
I’ll look it up and see what it’s all about.
LikeLike
Beautiful work, I especially love the watering can.
LikeLike
OH Thank you Cocoa!
LikeLike
These are beautiful! l
LikeLike
Thank you for such a lovely compliment!
LikeLike
Love your beautiful transformed art I also up cycle and create what I call Eco Jewelry from ‘Green ” material…
LikeLike
That sounds fabulous. I love the concept of turning some unwanted item into something of beauty.
LikeLike