gardens
Community

I Knew there was a Dutch Connection

Tulips

I’ve always been attracted to the Dutch culture. After all, who doesn’t like cheese? But the attraction was more than that, it was the tulips, the food,  scenery, lifestyle and especially the folk culture. I felt such an innate ‘pull’ towards seeing the Netherlands, that I visited there whenever the opportunity arose.  For many years, I’ve practised and continue to be fascinated by  the Dutch styles of Folk Art painting, particularly that from the villages in the north, who have ties to the Hansa and Scandinavian culture.

hindeloopen1

Dutch style Folk Art painting

But it was in researching my family that I discovered the potential Dutch connection in my family history. A DNA memory that might explain my fascination with Dutch culture. And I discovered it, not in The Netherlands, as one would suspect, but in fact, in Poland.

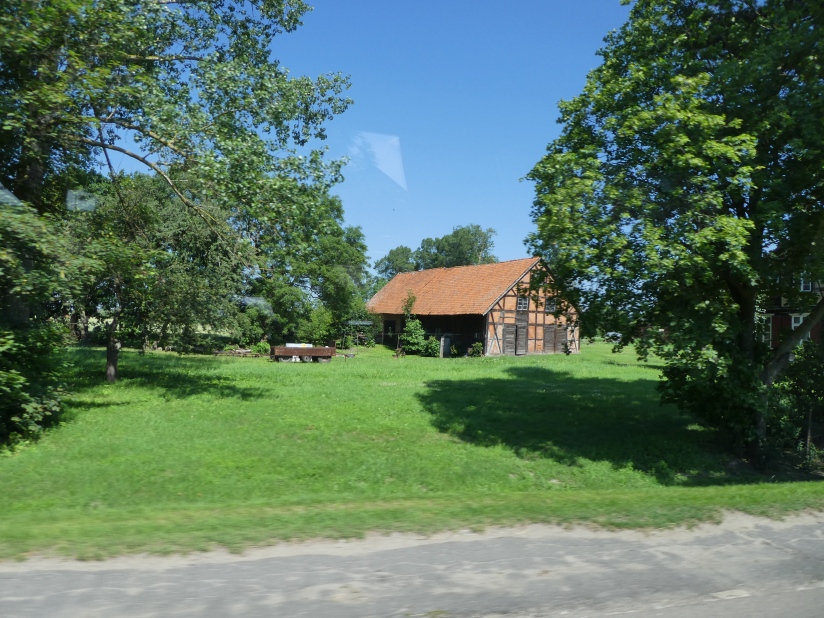
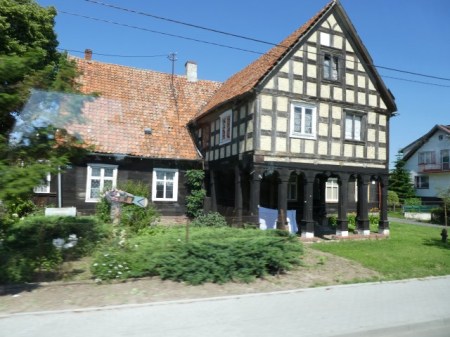
On a cultural trip to Poland, I learnt that several hundred years ago, Mennonite farmers from the Netherlands, were invited by the Polish-Prussian authorities to colonize the land near Poznan and Gdansk, (where some of my family lived),  due to their acknowledged expertise in farming very wet and poorly drained soils. They were given certain rights and privileges  not necessarily afforded to the local mainly feudal population, and thus quickly formed communities called ‘Olender.’

mennonite-houses-near-malbork
Mennonite farm in Poland

My historical curiosity wanted to know more. Was there a connection to my family?

In researching these Dutch communities in Poland, (many who came from Friesland), it seems that being ‘Olender’ could actually mean much more than just Dutch ethnicity, it could mean a town that followed a certain style of laws and religious practice. Olender , at first, seemed to be a contraction or parochial term for “Hollander,” (hailing from the Netherlands), but in time, Olender came to mean whole communities that followed a particular cultural or legal mode and could be a mix of Prussian, Polish and Dutch ethnicity. They really were embracing multiculturalism even then! But, unfortunately, it wasn’t all plain sailing.

mennonite-house-near-malbork
Mennonite community near Malbork Castle, Poland

They were often devout Lutherans, following old religious ways and were even referred to as ‘Evangelicals,’ in the Polish regions.
Towns that were once called ‘Klep….’ were later called  ‘Nowa …’ to sound more polish after independence was gained.  These areas it seems were areas that were settled by Mennonites from the Netherlands.

pitstop-outside-in-poland-where-i-had-bigos-small
A road side cafe in Elblag, Poland


Some of the Olender families from Zielona Gora, and Poznan, and in some cases, entire villages from Klepsk, in 1838,  emigrated to Australia, due to what they felt was religious persecution, or restrictions on their religious freedom.  In one document, requesting permission from the Prussian authorities to emigrate to Australia, the applicant family stated they could not ‘live in this world without being able to follow their old Lutheran ways.’  Religion and culture was extremely important to most people in the 19th century and indeed, also in earlier times. So one could see that it might be their high standards of personal freedom and their devout style of faith that led them to emigration to the New worlds.

20160714_152240-small

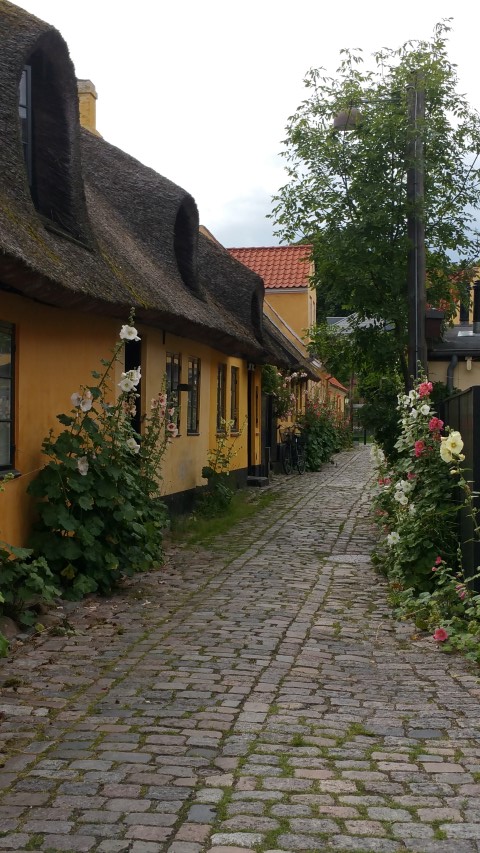
The influence of the Dutch was also present in communities in Denmark, especially the area on Amager, an island close to Copenhagen, where the international airport is located. Today, it is a treasured time capsule of cobbled lane ways and  yellow and white painted cottages, some still with thatched roofs.

p1090430-small

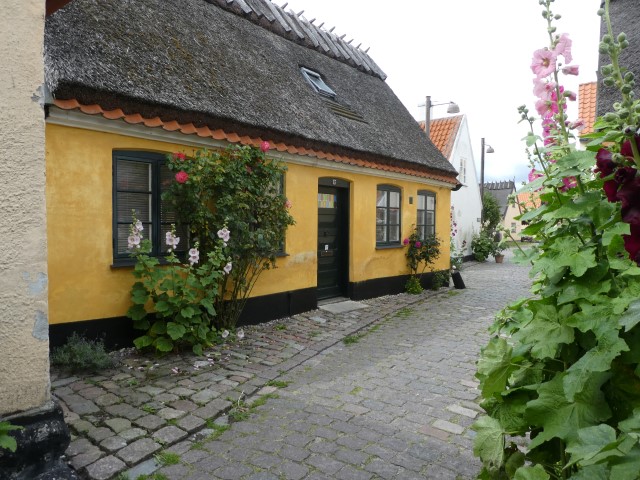
Once an area of sailors and their lady acquaintances, Dragor and the small villages such as Store Magleby, make for a delightful stop en-route to Kastrup airport. The dogs in the window were a sign to the sailors that the lady of the house was available for “visits!!”

So it seems that there was little coincidence in my visiting the very areas in both Poland and the Netherlands that were significant in my family ending in Australia. Although I can’t say that I would be over the moon to find out one of my female ancestors lived in Dragor!!!

Historic connections and DNA memory is Something I will often Ponder About


Book review

Family History Book – Hints on format, publishing

SONY DSC

Some tips from About.com

for making your own Family history book. Many of these tips could equally be applied to presentations or travelogues.

FAMILY STORIES AND NARRATIVES

Pedigree charts and family group records are an important part of genealogy, but for a family history book it is the narratives or stories that bring the family to life. Creative formatting of narratives in your book will make it more attractive.

  • Consistency – Develop a consistent but distinctive format for all narratives (margins, columns, font, spacing).
  • Grouping – Group narratives of key figures or other historical information at the front of the book followed by charts. Or, place biographies of key figures of each branch of the family immediately before their corresponding descendant charts.
  • Memories – Include a special section in the book for stories from later descendents to tell about what they remember of their family, what life was like growing up, and about their lives today.
  • Footnotes – Include footnotes or explanations of names so that those reading the Memories or other sections know that “Aunt Susie” refers to the Suzanna Jones found on Page 14 or that “the Baileys” are a family that lived next door. Create a specific style for such footnotes or notations and use it consistently throughout.
  • Small Caps – In genealogy it is common practice to place surnames and sometimes place names in all caps. This makes it easier for later researchers using your book to scan for relevant information. Use small caps, instead. The effect on scannability is the same but small caps enhance the overall appearance of your text.
  • Break-Up Text – Long blocks of text, no matter how well-written, are boring. Entice readers into the story and keep them reading with visual signposts within paragraphs such as initial caps, indents, bullets, pull-quotes, and boxes. For longer narratives, use subheads to break the story down into sections, such as by year or by location of the family during migration to other areas.

TABLE OF CONTENTS and INDEX

  • One of the first things your third cousin Emma is going to do when she sees your family history book is flip to the page where you list her and her family. Help out Emma and all your cousins (as well as future family historians) with a table of contents and an index.
  • Be sure that the genealogy or desktop publishing software you are using provides for automatic generation of an index or use third-party indexing solutions. An automatically-generated table of contents is nice, but the index is the more complex part of the book. While older published family histories may have omitted the index (before software, indexing was an often tedious, time-consuming job) don’t leave out this important component of your family history book.
    • Consistency – Keep the style of your table of contents (margins, fonts) consistent with the rest of your book.
    • Branches – Use the table of contents to show general sections such as narratives and descendant charts for each main branch of the family included in your book.
    • Surnames / Placenames – Include surnames and key placenames (towns, counties) in your index. You may also want to include the names of churches, organizations, businesses, and even specific streets that figure prominently in your family history.
    • Maiden Names / Alternative Spellings – For female members or instances where the family name changed significantly in spelling, consider using cross-references to maiden and married names or alternate spellings used by the same individual.
    • Page Numbers – Don’t forget the page numbers — ideally on every page of your book but at the very least if your TOC or index references a specific page, it should have a page number on it.

    Written for all types of publications, here are tips and advice on organizing and formatting a table of contents.

USING MAPS, LETTERS and other DOCUMENTS

You can dress up your family history book with maps showing where the family lived or photocopies of interesting handwritten documents such as letters or wills. Old and recent newsletter clippings are also a nice addition.

  • Consistency – As much as possible, fit these additional documents into the same format (margins, etc.) as the rest of your book. Even when these documents vary from your usual layout, maintain a consistent style for captions and notations.
  • Migration – Enhance a narrative about how an entire branch of the family moved from one state to another by including a map tracing their migration.
  • Boundaries – Create maps that show both current boundaries for counties, states, or other areas and the boundaries that existed at the time your family lived there. Use different styles of lines and a legend to show historic and current boundaries and routes of migration.
  • Translation – When including photocopies of actual historic family documents, also include a typed translation.
  • Recent Documents – In addition to historic documents, consider preserving more recent material for future generations. These might include drawings or handwritten stories by some of the youngest generations in your book and newspaper clippings or notations about current activities of living family members.
  • Blank Pages – Add a few blank or lined pages for future family members to make additional notes as the family grows.
  • Signatures – Sprinkle scanned signatures (taken from wills, letters, etc.) throughout your book. Place them near the text for that person.

CHARTS

Charts provide an easy way to show family relationships. However, not all chart formats used by genealogists are suitable for a family history book. They may take up too much space or the orientation doesn’t fit your desired layout. You’ll need to maintain readability while compressing the data to fit the format of your book.

There is no right or wrong way to present a chart of your family. You may prefer to start with a common ancestor and show all descendants or begin with the current generation and chart the families in reverse. If you intend for your family history to stand as a reference for future family historians, you’ll want to use standard, commonly accepted genealogy formats. Some provide greater space-savings than others.

While genealogy publishing software may automatically format charts and other family data in a suitable fashion, when formatting data from scratch consider these tips:

  • Consistency – When listing birth, marriage, death, and other pertinent dates, be consistent in your format throughout the book. Consistency is important throughout your book.
  • Indents – Use indentation with bullets and/or numbering to list successive generations of descendents. The indents help to maintain readability when compressing chart information to save space.
  • Keep Info Together – When continuing information to another page, end on one individual and start the next page with a new individual if at all possible.
  • Small Caps – As with narratives, use small caps (rather than standard all caps) for surnames.
  • Boxes or Lines – If making boxes or drawing lines on charts that connect family lines, be consistent in the line style used.

PRINTING

Many family history books are simply photocopied. When only a small quantity is needed or when you can’t afford other options, this is perfectly acceptable. There are ways to give your family history book professional polish, even with low-tech reproduction methods.

Although almost the last step in the process, think about your printing and binding method before you start your book project. Talk to a printer. They can give you advice on low-tech and new technologies that will yield good results at the lowest costs. Sometimes the printing and binding methods will dictate certain design and layout requirements. For example, sidestitching requires extra room for the inner margin and some binding methods don’t allow you to open the book flat or are better for books with fewer pages. /p]

  • Photocopies – For photocopying from your printed original, it’s usually best to use a laser original for the sharpest results. Print some test text and photos and photocopy them before you proceed too far. It may take some experimentation to get your photographs to copy well.
  • Digital Printing – Discuss both photocopying and digital printing options for small runs with your printer. Color digital printing costs a lot less than it used to.
  • Covers – If full color isn’t an affordable option for the book itself, a color cover can dress up your book. A good heavy stock will help your labor of love withstand wear and tear. You may even want to expend a little extra on the cover to have it embossed with the family name. Another nice option would be a diecut where a photo of the family shows through.
  • Binding – Some fairly inexpensive binding options include saddlestitch (for booklets, small histories), sidestitching (you’ll need to allow extra inner margin room), various spiral bindings, and thermal binding.